The information below is about our new Agent Billing Tool. We have a new section under the maintenance drop down menu named “Billing Management” with four new or updated features for Agent Management.
.
Billing Management (New Features)
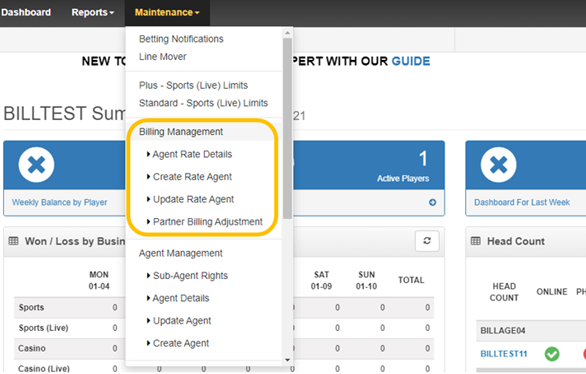
1) Billing Management:
The Billing Management option will give the user the breakdown of all agents that are currently under him/her as their own “Master Agent” and their respective rates. There is an option to edit the agents’ setup by clicking on the black pencil shaped icon on the left. The “Current Balance” row shows the per head charge each agent owes the main agent

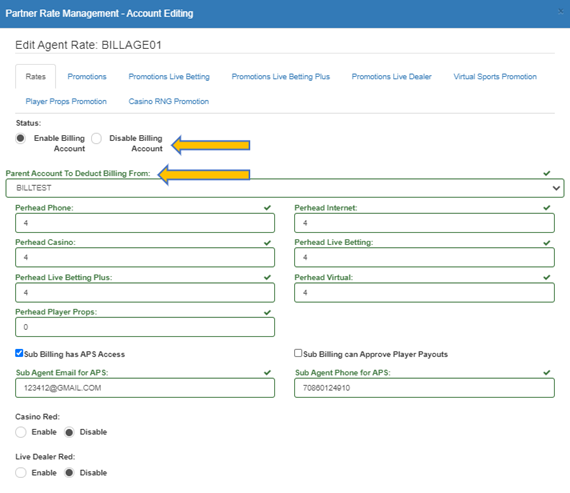
Clicking on that icon will allow you to change the rates for each agent, disable /enable the billing account, disable /enable the Agent Payment Solution tool. You can also choose “Parent Account to deduct Billing From” which would be the account that would automatically get the per head charge deducted from.
2) Agent Rate Detail:
Under the “Agent Rate Detail” option, the user will be able to see all the agents and the rate breakdown for each specific agent under that chosen agent.
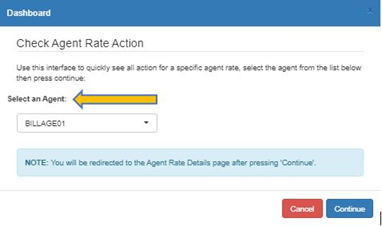
This is the information you will find after choosing the agent in “Agent Rate Detail”. (The icon highlighted in yellow has the same functionality as in the example above)

3) Create Agent: (From the “Agent Management” section)
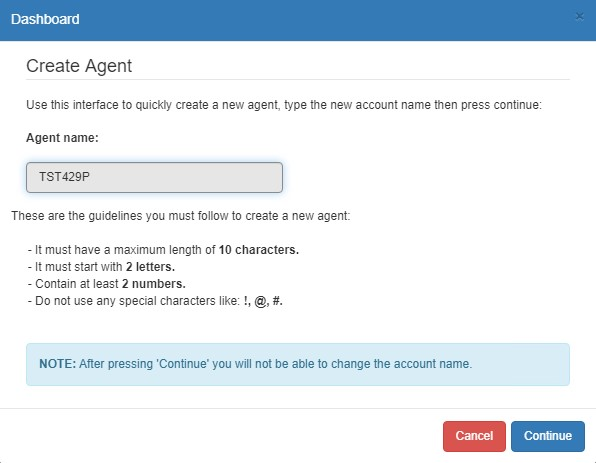
The user will have to choose an agent Id that the system will accept following the specifications provided
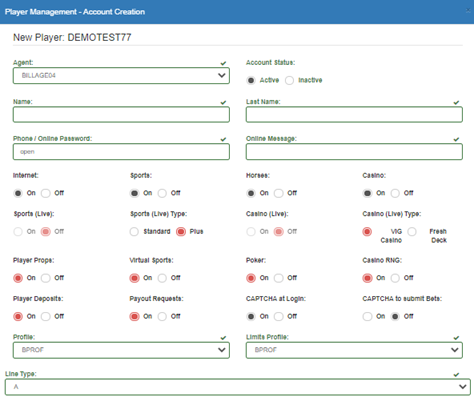
Once the system accepts a new agent Id, the user will have to fill in all the agent information. ****IMPORTANT NOTICE **** If the user wants to set up an agent with rates, the Account Type must have “Master Agent” clicked on (Top right in the image below).
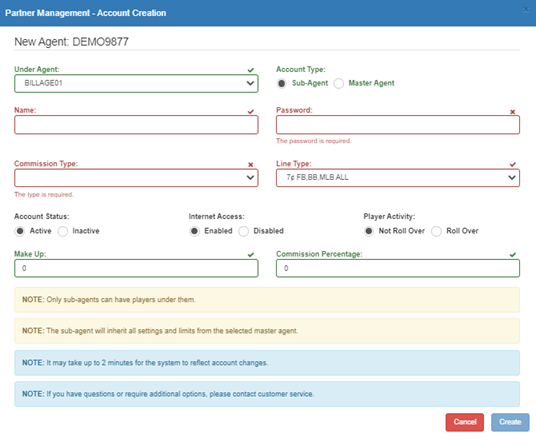
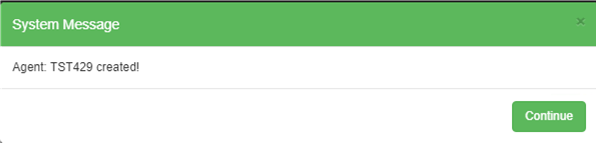
The user will get a verification flag once the agent is properly created.
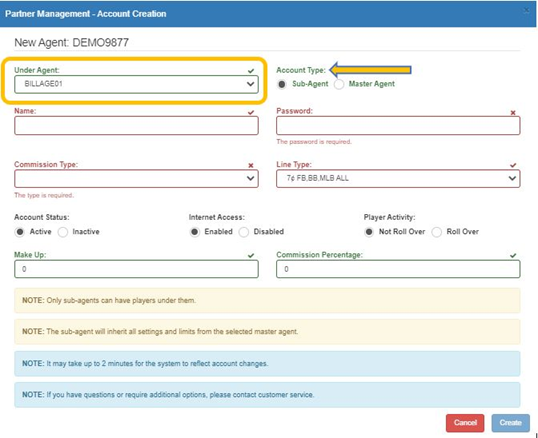
Now with the new Master Agent is created, the user will need to create a subagent to hold the players/ agents.
Example of a subagent creation:
When creating a Subagent, you must choose the Account Type as a “Sub-Agent” marked in yellow below
Once the subagent is created, the user will be able to create players for that Subagent. (Player from other agents could be transferred to the new subagent)
Example of player creation under same hierarchy.
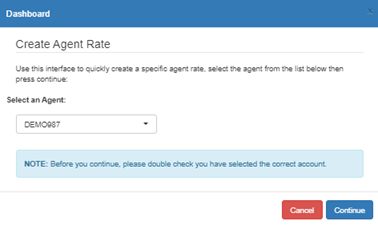
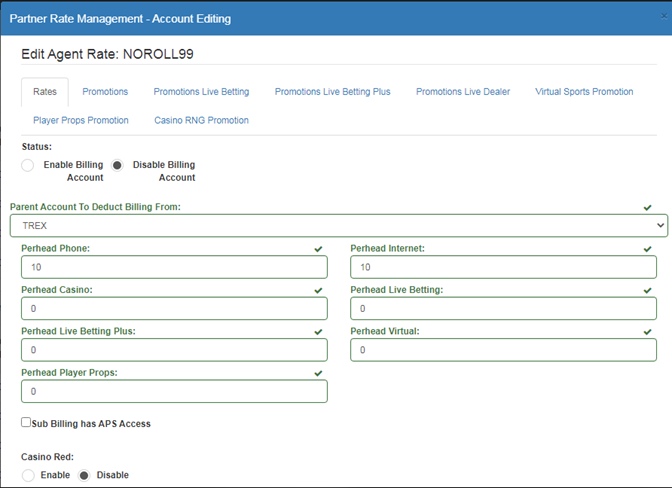
4) Create Rate Agent:
In the “Create Rate Agent” the user will have the ability to set the rates, promotions for Standard and Live Wagering Plus, Live Dealer Promos and Promotion for virtual sports.
Before the user can find an agent in the drop down menu, the agent would have to be set up as a “Master Agent”. If an agent is created as a Subagent, this will not allow him/her to have rates. Subagents will have to be created to hold the players and/or other subagents.

NOTE: When creating agents, the user will need to make sure to choose accordingly: Master Agent = Account that will have the rates and will hold Subagents. Subagent = Account will hold players and/or subagents.
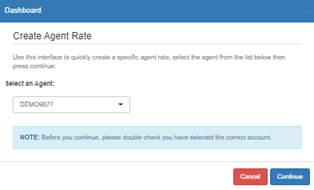
Once the user chooses the agent that will get rates set up:

The user will get all the fields that rates (and promos) can be set in. If you want to grant access for the new accounts to the Agent Payment Solution you would have to enter valid information in the fields highlighted in yellow:
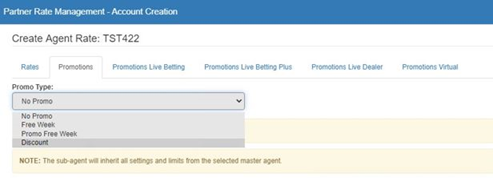
How to set up the promos:
The User will choose the type of promo that will be applied to the account:
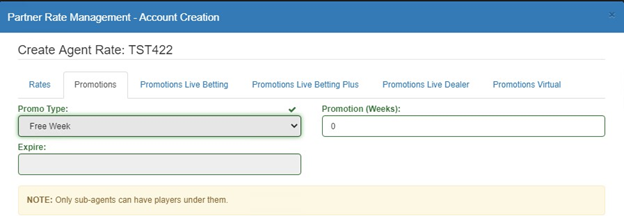
Example of a promo would be choosing a free week for a billing agent. (The user must set an expiration date to such promo)
5) Update Rate Agent:
The user can update the rates for any agent anytime. He/she can click on “Update Rate Agent” which takes them to the following screen:
6) Partner billing Adjustment:
In this feature, the user will be able to make receipts or disbursement which would affect the BILLING account directly.
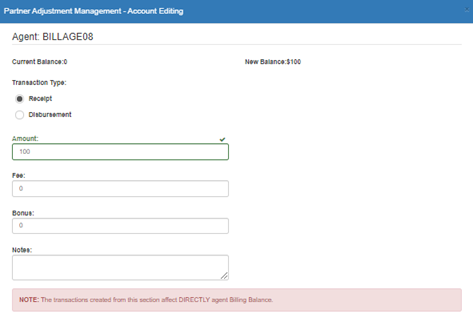
The transaction would be found under the “current balance” row. (Image below)

If you have any questions, you’re more than welcome to contact our Customer Relations Department.
*************************************************************************************